Thread Repair Tool Wear- Thread Inserts High-strength For Zinc Alloy For Engineering Plastics For Aluminum Alloy For Copper 1D 1.5D 2D 2.5D 3D
Описание
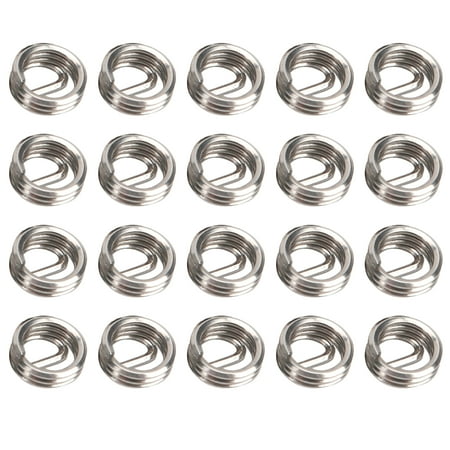
Thread Repair Tool Wear- Thread Inserts High-strength for Zinc Alloy for Engineering Plastics for Aluminum Alloy for Copper 1D 1.5D 2D 2.5D 3D Specification: Item Type: Thread Inserts Material: SUS304 Model: M2.5x0.45 Thread Specification: M2.5x0.45 mm Outside Diameter Before Installation: Approx. 3.2 ~ 3.5mm / 0.1 ~ 0.1in Diameter of Drilling Drill Bit for Installation: Approx. 2.6mm / 0.1in1D/1.5D/2D/2.5D/3D: Length After Installation: Approx. 2.5mm / 0.1in3.8mm / 0.1in 5.0mm / 0.2in 6.3mm / 0.2in 7.5mm / 0.3inNumber of Turns Before Installation: 2.6/5.9/8.2/10.5/12.8Thread Protective Sleeve Model Specification Description: For Example: M3x0.5X1.5D which means that after the screw set is completed the female thread is M3 the pitch is 0.5 and the length is 1.5D length refers to 1.5 times the diameter that is 1.5x3=4.5mm the length here refers to the length after installation.How to Use: 1. Drilling Use the drill bit of the size listed in the parameter table of the wire thread insert to drill the hole. Be careful not to drill the hole into a cone shape. The chips generated by the drill hole must be blown out with compressed air. After drilling the counterbore should not exceed the depth of 0.4 pitch. Too large counterbore is not conducive to the screwing of the wire thread insert. 2. Tapping Use special taps for wire thread inserts to tap. The depth of the tapping must exceed the installation length of the thread inserts. After tapping use a compressed air spray to blow out the debris. When the thread accuracy is high check the tapped bottom hole with a special bottom hole plug gauge for wire thread inserts. 3. Installation Put the wire screw sleeve into the installation wrench figure 5 on the right insert the wire screw sleeve installation tail handle into the guide rod of the installation wrench and turn the handle of the installation wrench to screw the wire screw sleeve into the screw hole. For installation of M14x2 or more phase thread thread inserts you can use the T type slotting simple tool to install; Note: During the installation and screwing process of the thread inserts there should be no pressing in the vertical direction to prevent jumping teeth. The correct method is slowly screw in the direction of thread rotation. 4. Remove the handle break off the mounting handle Use a breaker to break the mounting handle. Use about 200g of coconut to hit the breaker instantly and the handle can be removed. Do not use the mounting wrench to rotate in the opposite direction. Do not break the mounting handle. This situation is very easy. As a result the tail shank was broken and the wire was pulled out. 5. Unscrew When installation problems occur during the installation of the wire thread insert such as jumping teeth the thread insert needs to be removed and a special sleeve remover should be used to remove the wire thread insert. Package List: 100 x Thread Inserts
График изменения цены & курс обмена валют
Пользователи также просматривали

$532.82
Прямая продажа с завода полированные колеса для легковых автомобилей 20X9,5 5x112 CB 66,45 лучшее качество по непревзойденной цене
aliexpress.com
$26.01
Ultra-thin Floor Drain Gun Gray Anti-odor Bathroom Drainage Stainless Steel Floor Drains 10cm Bathroom Sink Hair Catcher
aliexpress.com
$1,500.00
Макетный комплект 453-00135-K1 саммит SOM 8M Plus четырехъядерный процессор 4 Гб LPDDR4 32 Гб eMMC
aliexpress.ru
$10.05
Статуя ведьмы на Хэллоуин, статуя ведьмы из смолы, коллекционная статуя ведьмы, статуя ведьмы на Хэллоуин, Осенний урожай, ужас, статуя ведьмы, декоративные принадлежности
aliexpress.ru
$42.41
Nordic Tassel Throw Blanket Single Full Four Season Cotton Sofa Cover Dust Anti-cat Scratch Protection Cover Sofa Blanket Carpet
aliexpress.com
$18.46
V-neck chiffon loose pure color summer womens t-shirt cross-border trade Amazon Women's T-shirt gray22
aliexpress.com
$15.72
Новый кабель платы питания USB-порта для Lenovo M520 MIIX 520-12IKB 5C50P92343 плата ввода-вывода
aliexpress.com
$17.68
B50 4 мм/4,8 мм/5,2 мм/5,5 мм, 2 в 1, легкая пилка для бензопилы, приблизительные наборы точильных камней
aliexpress.com
$11.25
Winter Thickened Plush Bed Sheet Mattress Toppers Thin Tatami Mat Dormitory Single Double Bedspread Fold Non-slip Mattress Cover
aliexpress.com
$24.23
3PCS Propagation Station Wooden Hanging Vase For Dried Flowers, Wall Plant Holder, Boho 3Pcs
aliexpress.com
$27.68
warm coat men fleece hoody sweatshirt Atheism Rational Thinker Philosophys Atheist Gift winter hoodie for boys drop shipping
aliexpress.com
$26.82
Motorcycle Handlebar Riser Clamp Extension Handlebar Adapter Mount For Pan America 1250 S PA1250 PA 1250S
aliexpress.com
$28.37
Seals Cat Nest General Summer Seasons Unpick And Wash The Dog Nest House Cat Bed Pet Products In Winter To Keep Warm FULLLOVE
aliexpress.com
$5.84
3.7V 260mAh 502030 Lithium Polymer Li-Po Rechargeable Battery For MP3 MP4 speaker Tachograph Car DVR Camera Bluetooth Headset
aliexpress.ru
$9.09
Новинка 2021, 100% протестированный оригинальный BL243 мобильный телефон аккумулятор для lenovo K3 Note K50-T5 A7000 A5500 A5600 A7600 аккумулятор
aliexpress.ru
$2.99
Creativity Totem Printed T-Shirt Women Fashion Short Sleeved Casual Harajuku T-Shirt Femme Streetwear Tops Tee Shirt
aliexpress.ru
$36.79
4 In 1 Foldable Weight Benches Press Chair Bench Gym For Abdominal Support, Dumbbells For Workout Fitness Equipment
aliexpress.com
$1.27
Новинка, забавный Забавный набор пальцев, игрушки из 10 шт., куклы На пальцы, игрушка, имитация маленькой ладони, игрушки На Новый Год
aliexpress.ru
$7.69
Sexy Sleeveless Hollow Out Party Club Dresses for Women 2022 Summer Fashion Solid Hollowed Out Backless Mini Dress
aliexpress.com
$4.49
Artificial Parrot Figurine Resin Parrot Statue Blue Bird Sculpture with Hat Pumpkin Outdoor Garden Decoration Home Patio Yard
aliexpress.com
$172.20
Car Mattress Rear Travel Bed Back Seat Sleeping Pad Sleeping Pad Artifact Folding Bed Non-inflatable Bed Car Car Bed
aliexpress.com
$0.75
4pcs Car Tire Valve Stems Cap Aluminum Alloy for Chevrolet Cruze Captiva Equinox Spark Tahoe Aveo Camaro Lacetti Accessories
aliexpress.com
$11.58
Модный дизайн личности cz Медь морковь булавка брошь фруктовый Овощной орнамент ювелирные изделия аксессуары
aliexpress.ru
$13.46
Гобелен King, украшение на стену, очень большой, в стиле Триппи, мандала, хиппи, разноцветные цветы, настенное одеяло, украшение для спальни
aliexpress.ru
$14.34
Ive Hoodies IVE ELEVEN Hoodies Sweatshirt Kpop Autumn Winter Hoodies for WOmen Men
aliexpress.com
$49.85
Ботинки мужские винтажные, повседневная обувь, кроссовки, рабочая мужская обувь, кожаные, холщовые, модные, черные, зима
aliexpress.com
$6.67
Конструктор Десятое Королевство Гидравлический экскаватор 02949, Гидравлический экскаватор
pleer.ru
$17.25
126pcs/Set Matte white Gold Metallic balloons garland arch kit baby Shower wedding birthday party Chrome Balloon Decoration kids
aliexpress.com


